How to Stay Flexible After 40: 13 Stretches for Improving Mobility
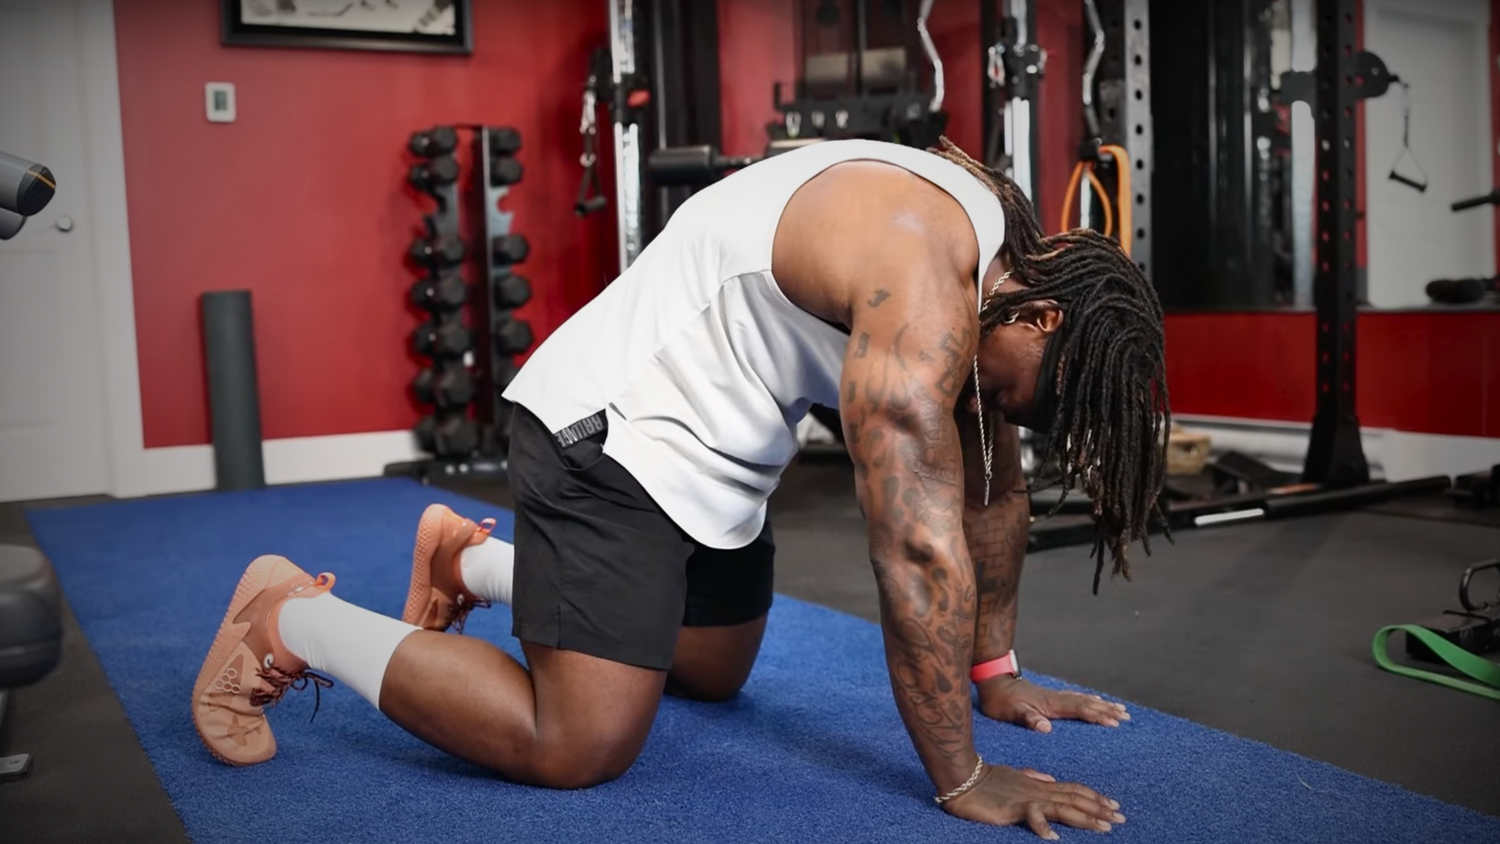
When you get up there in age and feel stiff mobility is your salvation. When you're 40 and up working on mobility becomes essential. So, I'm giving you 7 essential exercises that I've used to improve my mobility after 40.
When I started bodybuilding I put my mobility on the back burner. After prioritizing stretching for the past 3 years I'm more flexible than I've been in decades. These are the exercises that I do myself to keep myself loose and mobile as I get older.
Whether you're younger or older performing these movements regularly will help you stay limber and healthy throughout your life.
To watch me demonstrate these movements watch this video ⬇️ Otherwise, read on.
The Importance of Maintaining Flexibility and Mobility After 40
Stretching and mobility exercises play a vital role in keeping our muscles and joints healthy, preventing injury, and enhancing our range of motion.
Performing these stretches regularly will feed into and improve your daily activities, posture, and reduced pain.
Specifically, you'll feel pain reduced in areas prone to stiffness like the lower back, shoulders, and hips. Keeping the body functional and agile and significantly contributes to improving quality of life as we get older, making everyday tasks easier and more manageable!
Now, let's get into the exercises.

Ankle Circles
This is a simple one. You can do these throughout the day, when you first wake up, at the office, while you're cooking, whenever. You can even do them in bed.
Performing ankle circles regularly offers numerous benefits that extend well beyond just improving your mobility. Firstly, this simple exercise enhances blood circulation to your feet and lower legs, which can reduce swelling and promote faster recovery.
Additionally, by improving the range of motion in your ankle joint, you also reduce the risk of sprains and strains.
Whether you're an athlete looking to optimize performance, or simply seeking to maintain your mobility as you age,
As simple as they are, ankle circles can provide foundational support for your overall physical well-being.
Performing the Exercise:
- Put your foot out in front of you and rotate all the way around.
- Try to go as far around as you.
- Do 3 sets of 5 rotations each way. (Clockwise and Counterclockwise)

Rag Dolls (Lower Back)
These are great to do right out of bed after waking up. You can do this sitting or standing, but this position is easier to perform seated.
Performing Rag Dolls can effectively decompress your lower back. When you fully flex your head, it triggers a flexing response in your cervical spine, thoracic spine, and lumbar spine, allowing them to bend and stretch downward. If your mobility is limited, it's okay to slightly bend your knees.
This pose aids in relaxing your body and loosening up the muscles. As you settle into this position, you will feel your back becoming more and more flexible.
Performing the Exercise:
- Put your feet flat on the ground a
- Get into a rag doll seated rag doll position. Basically hanging and folding your body over.
- Let your body get loose between your legs
- Breathe in, exhale, and let yourself just hang over, loosening up your lower back.
- Relax into this position
- Sway side to side a bit
- Then Slowly come back up

Pigeon Pose (Hips & Glutes)
If you're into the gym like me and you've packed on some mass around your hips, you might notice a struggle when suddenly attempting to tie your shoe while sitting down. Your hips can get so tight that even something as simple as bending down becomes a challenge.
Trying out the pigeon pose can work wonders to free up your hips glutes, and lower back. You might not nail the perfect form right away, and that's totally fine. Make use of a bench.
If you're at the gym, adjust the bench incline to a level that suits your flexibility.
Perform the Exercise:
- Put your foot in the crevice of the bench and let your leg lean flush against the bench
- From there twist your knee and let that back leg drop
- Try and get deeper and deeper into the stretch. Push your chest to your knee which is going to stretch the butt even more
- If you want even more of a stretch let your weight drop even more
- Use my hands to keep yourself stable
- Hold this pose
- As you become more comfortable in this position lower yourself even more
- Perform this pose on both sides
Cat and Cow
The Cat and Cow pose is pretty simple.
The goal of this stretch is to loosen up the scapula and lower back by moving them through a functional range of motion. We're actively stretching the lower back and shoulders.
Performing the Exercise:
- Start off by making sure you've stacked the joints properly. We want our wrists, elbows, and shoulders stacked on top of each other.
- In this position, the width of your knees should match the width of your hands.
- Next, press your toes into the ground, lower your chest down and up while moving your butt back.
- Push and protract for the cat pose, lifting up, stretching, and separating the shoulder blades.
- Push into the ground, and extend your stomach or belly button towards the ceiling, then relax.
Added Wrist Stretch
Wrist mobility can often be overlooked, but most people are lacking in good wrist mobility. Stiff wrists can cause a chain reaction to elbow issues like tennis elbow.
While you're in the Cat and Cow Pose, spread your fingers and hands and make circular movements with your wrists. Twist your hands around in a circle.
And to make it even more challenging, you can twist your hands back further. Rolling around each side will help open up your wrists.
This is simple to do and can also be done against a wall. But I prefer doing these exercises on the floor during my Cat and Cow pose.
Now that we've addressed our ankles and glutes, let's focus on the knees.
Knees & Hips
Our knee and hip joints are like the pillars of our body, holding us up and helping us move in a variety of ways.
Having flexible knees and hips is key for doing daily things like walking, squatting, and going from sitting to standing.
Not only that, but it's a pretty big deal in your ability to play sports. It makes your movements more fluid and safe. Doing specific exercises for these areas can keep our joints healthy for the long haul and keep us feeling great every day.
So, there are a couple of things you can do for your knees.
Resistance Band Knee & Hip Stretch
Let's tart by using a resistance band to simultaneously stretch your hip flexors and knees.
Performing the Exercise:
- Begin by securing a resistance band.
- Place the band near your glute on the leg you're stretching.
- Lower your knee to the ground.
- Allow the resistance to guide you forward while pushing your knee ahead, maintaining an upright chest.
- Keep your chest up, align your toes with your shin, and stretch your Hip Flexors.
- As your knee slightly bends, push back to stretch your hamstring.
- Pull your toes upward, ensuring alignment of your hips.
- Deepen the stretch gradually.
- Maintain an upright chest, push your knee forward, return to the starting position, and switch legs.
Go as far as your body allows. Start by stretching your hamstrings, bringing your chest towards your knee, and then switch sides.
Hip Stretch
Here's one for the hips specifically.
Performing the Exercise:
- Lie on your back with one leg up, and make circular motions with your knees.
- Focus on keeping your hips stable and flat
- Then switch directions.
This is great for loosening up your hips.
Now that we've gone from floor to core, let's target the shoulders.
Shoulders
Resistance Band Shoulder Stretch
Moving up to our shoulders, this is one I've made up myself and works wonders.
Being a bodybuilder I've seen a lot issues for us when it comes to shoulders. We'll have issues with our external rotation and internal rotation or the inability to open our back up and open our shoulders up.
I've found a solution for this using a resistance band.
Performing the Exercise:
Choose your band in terms of your fitness level. I'm a bigger guy with more muscle density so use a stronger band.
- Position your hands behind your back as if you are performing a back lat spread.
- Maintain this position with the back of your fists resting on your hips, ensuring your chest remains upright.
- Take a few steps back, allowing the resistance band to gently separate your shoulders.
- Hold this position and focus on the stretch.
- Keep your chest lifted slightly to intensify the stretch.
- Exhale, take a further step back, and feel the stretch deepen.
You'll feel a nice stretch in the front of your delts and a nice stretch from your back opening up your scalps.
This stretch is simple, yet effective.

Shoulder Cars (Shoulder Articular Rotations)
This is an easy one to do in the, or really any time throughout the day. You can do these against the wall or not. Either way, they're pretty easy to do.
You'll basically be doing circles with your arms. This is a good way to find out how mobile your shoulders are.
When you do these against a wall the goal is to see how close you can get to the wall while doing these circles and without having to open up your shoulder.
If you're not doing these against a wall, it's totally fine. You'll still get a good stretch in your shoulders.
Performing the Exercise:
- Start with your hands by your side, thumbs pointing out.
- Bring your hand all the way up fully extending your arm.
- Push your hand all the way up and away until your hand is above your head.
- Once your hand reaches the very top you're going to flip your thumb to the outside while you reach back and keep moving your arm on the way back and back to your starting position.
This movement is going to help open your shoulder cap. You're rotating your bone in that socket and really getting some good movement in your shoulder cap.
While performing these you might find that one side is harder than the other. That's completely normal.

Shoulder Overpass
You've probably seen this movement done as a warm-up before lifting. It's simple to do, all you need is a resistance band.
Performing the Exercise:
- You're basically grabbing either side of a resistance band
- Extend the band, and pull it up and over your head.
- Remember we're always pushing the hands away the entire time and then down all the way to the back
- Then come all the way up to the front and all the way to the back again.
- Take deep breaths as you perform this stretch
- Do these 10 times for 3 sets
- Take your time and perform this stretch with slow and controlled movements.
Do every movement slowly. Let yourself melt into each position so that exercise is going to help with opening up your chest.
Chest
Shoulder Overpasses are effective for chest opening, yet there are additional stretches I highly recommend post-training.
Performing chest-opening stretches regularly alleviates pressure on the back and shoulders and also enhances lung capacity.
By expanding the chest area, you allow for deeper, more efficient breaths, which can increase oxygen flow to your muscles and brain, leading to improved concentration and stamina.
Plus, these stretches release tension in your chest, helping you relax and lower stress levels.

Chest Opener
Performing the Exercise:
- Place your hand on a wall, rack, or door frame.
- Maintain a 90-degree arm position.
- Gently pivot to open the chest.
- Embrace the slight discomfort, it's a good sign.
- Hold for a few seconds until discomfort eases.
- Repeat 2-3 times with each arm.
Neck
Neck stretchers offer so many benefits for folks wanting to loosen up and get more flexibility in their neck.
By gently stretching those neck and shoulder muscles, these devices help ease stiffness, boost your range of motion, and keep your posture in check.
Using them regularly can really help with that pesky neck pain from sitting too long or sleeping awkwardly.
Plus, they're good for decompressing those spine bones, especially if you've got nerve issues. Basically, adding neck stretchers to your wellness routine can help you feel more chill and comfortable in your upper body, making life a whole lot better.

Thread the Needle (Standing)
This is somewhat like Thread the Needle, only standing up.
This stretch is a great alternative for anyone who finds the traditional Thread the Needle challenging.
Last but not least we're doing some simple neck movements.
Neck Movement
Performing the Exercise:
- Simply move your head around in circles.
- Make sure your movements are slow and controlled.
- Look to one side, look forward then look to the other side
- Look down, look forward, then look up.
To wrap it up, maintaining mobility and flexibility, especially after hitting 40, allows for a broader range of motion, reduces the risk of injuries, and improves posture, balance, and muscle strength! Remember, it's never too late to start! Set the mood, play some music, and add a few of these stretches into your routine. You'll enhance your quality of life and overall health.

Elevate Your Training Today!
If you're ready to maximize your growth and finally achieve your dream physique, check out some of the effective resources on my website, Jonnieshreve.com.
🔥Private 1 on 1 Online Coaching
, you can find it all!
And if you’re looking to hit the stage this year, check out my Hardcore Training Contest Prep! 💪🏾


